Holograms at the Design Museum
What?
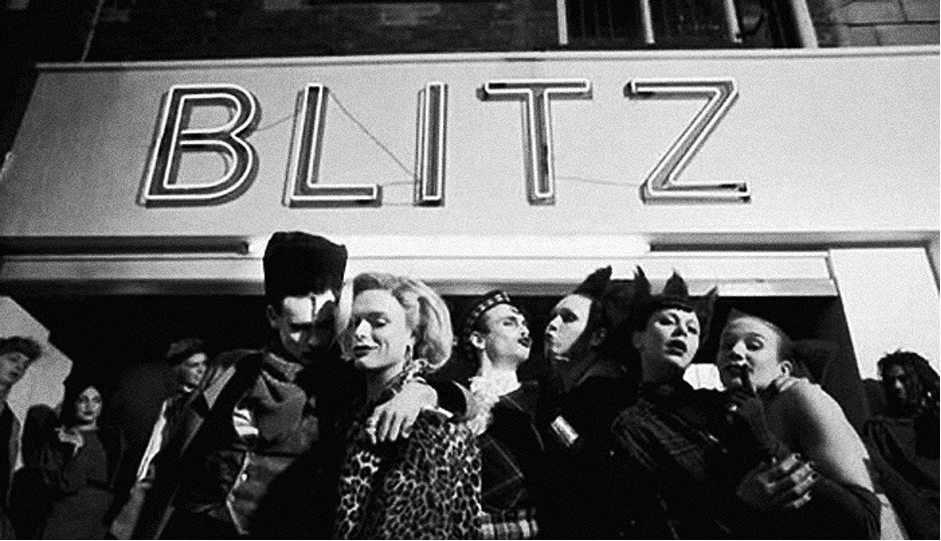
A multimedia exhibit at the Design Museum in London to celebrate the Blitz Club, an iconic venue in the early '80s which hosted several emerging bands through the years when it was running. The exhibit recreates the main room of the club 1:1 and, on the stage, five holograms of the members of an iconic band performing their hit.
My Role
The holograms consisted of a projection on a semi-transparent screen called Hologauze, designed to create the illusion of the performers being present in front of visitors in life-size scale.
How to do that?
There was no archive footage that could be projected and give such illusion, therefore the footage required to be produced ad-hoc.
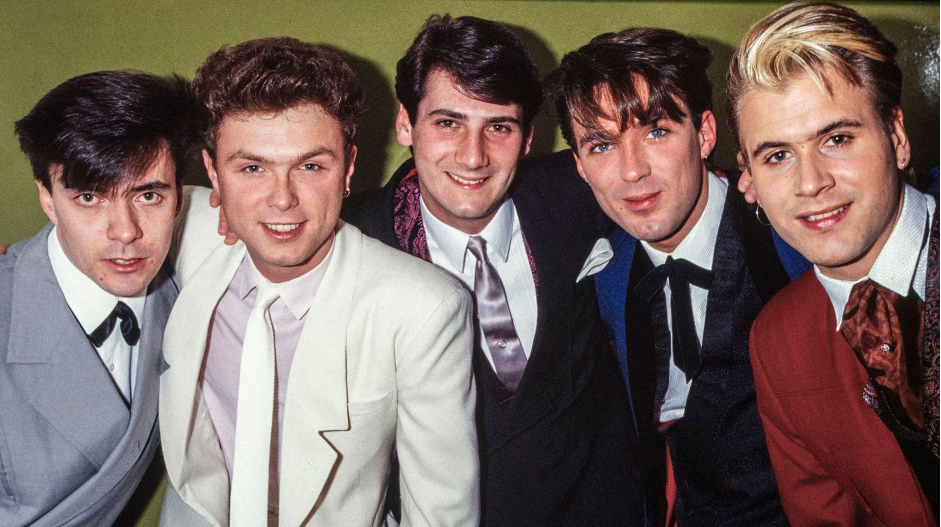
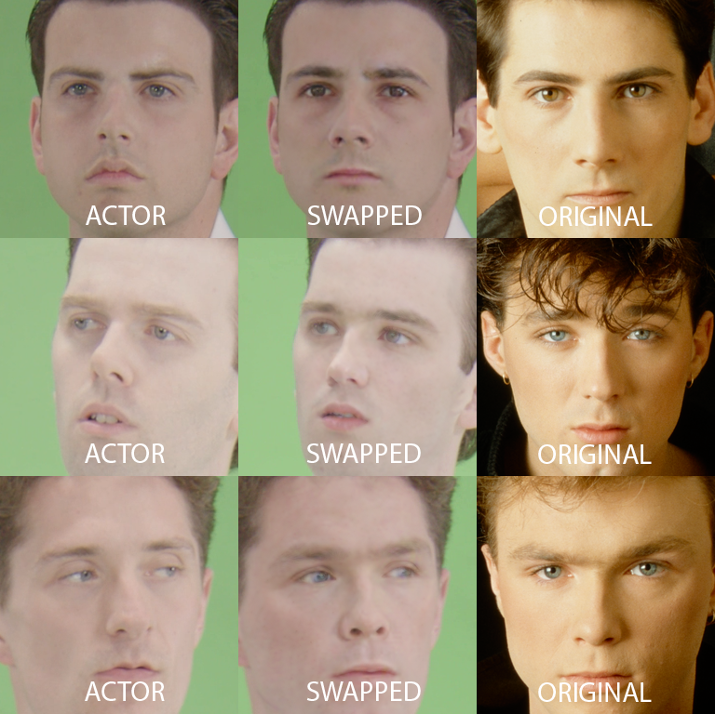
The approach we identified was the one of casting actors in their early 20s who resembled the members' body shapes and face geometry of the band. After that I proceeded swapping their faces using Machine Learning tools so they would appear as Tony, Martin, Gary, John, and Steve.
Initial Research
We are familiar with de-aging workflows like Will Smith in Gemini, Robert De Niro in The Irishman, or Harrison Ford in Indiana Jones. However, those pipelines require the expertise of dozens of VFX artists, vast resources, and a long time. I had to identify a solution that was single-handedly manageable, sustainable, and compatible with the limited time and resources at my disposal.
In the recent years we witnessed a plethora of GenAl tools being released weekly, but in practice are they working? What are the limitations and quality level? Are they production ready and can fool the keen eye of filmmakers?
I started scouting current technologies in the realm of deepfakes and faceswaps to find a feasible way to have each band member performing their song for the exhibit
My journey started from something easy to pick up and play with. I explored all-in-one solutions like Runway and Viggle but quickly ran into limitations (...and probably some more I don't remember now):
- Limited flexibility for customizing outputs
- No debugging logs when errors occurred
- Short export durations (seconds, while I needed 3 min 30 sec takes)
- Lack of consistency
- Fragility with actors performing freely, including head rotations, facial expressions, and obstructions like instruments or hair
Discovering ComfyUI
Then I came across ComfyUI, an open-source, node-based Al tool that was being built and maintained by a community of developers releasing more and more features to generate or alter images and videos.
It was promising because it was
- Open source -> easy experimentation without subscription costs
- Node-based -> highly modular and flexible
- Large ecosystem of community-built nodes and models
At the same time the challenges were the following:
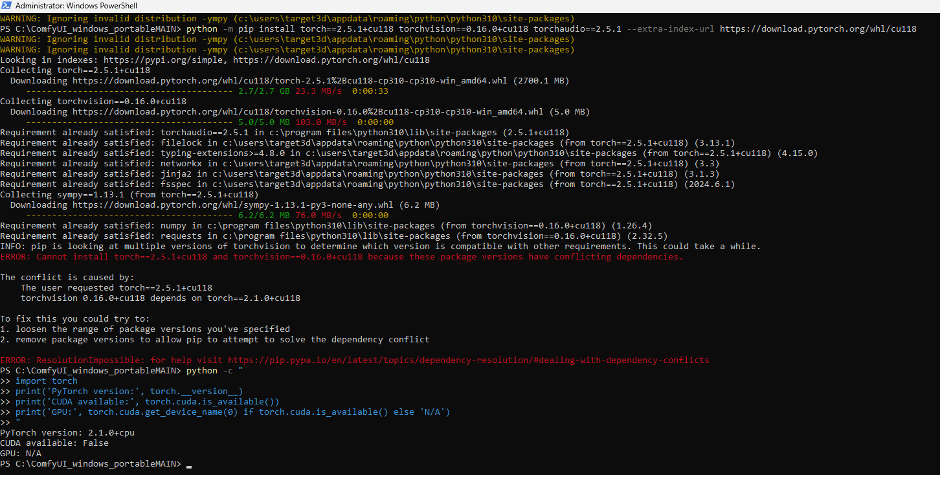
- Installation required careful management of Python, PyTorch, and CUDA drivers
- Node compatibility (e.g., ReActor) had to be checked for each combination
- Understanding the "layers" involved: ComfyUI -> Nodes -> Pretrained Al models -> Training datasets. It was to me a sort of russian doll in a way because to fully understand how everything interacted I had to go back to the source of several github repositories.
This process, however, became an unexpected opportunity. I found myself operating much more than usual in the terminal and handling system integration tasks: Python installations, PyTorch versions, CUDA drivers, environment paths, library conflicts. It gave me headaches at times, but when things finally worked, the sense of accomplishment was certainly rewarding.
ReActor for Faceswap
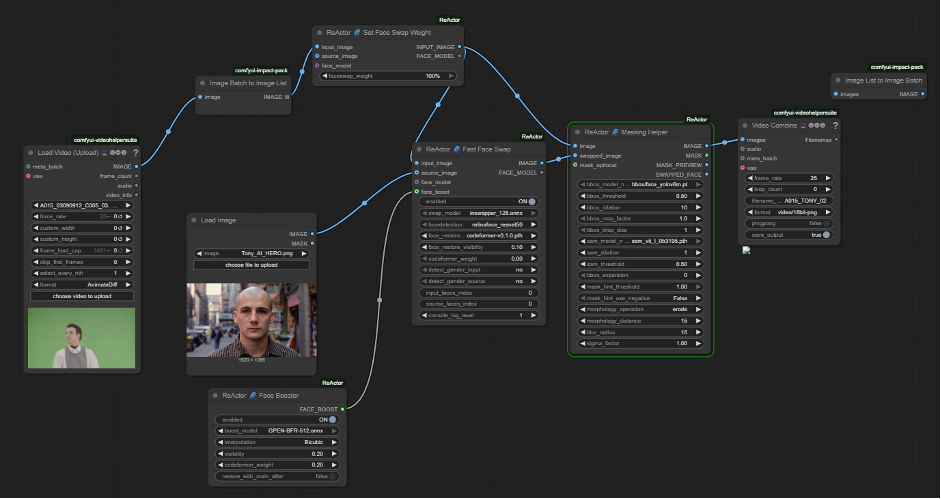
Within Comfy UI I identified a custom node that could serve my purpose: ReActor
ReActor was using a library called Insightface capable of both detecting the face in the image and then faceswap that image (thanks to the pretrained model inswapper_128).
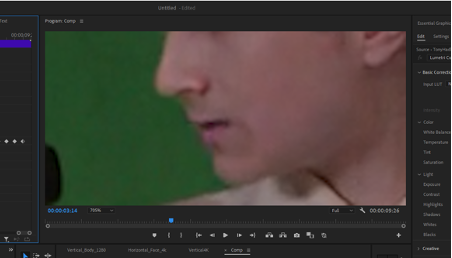
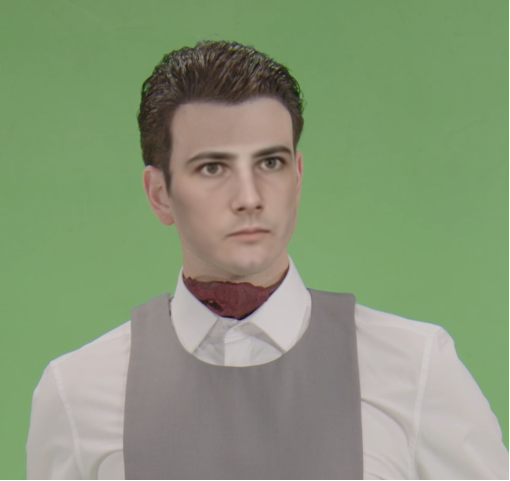
It was a matter of inputting both the source (actor) and target image (band member) and ReActor would have faceswapped the band member face into the body of the actor.
To fine-tune the face swap, it was necessary to use an additional node responsible for masking. This step allowed for a smoother blend between the two images and reduced the visible seam around the swapped face.
Oddly enough, after several tests, preprocessing the archival photos of the member in Runway to remove hair significantly reduced the artifacts generated by reActor. Eliminating forehead hair improved the output quality, which is why the target image appears shaved.
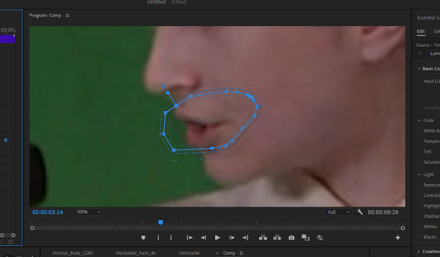
I also found that ReActor struggled when it came to swapping faces while keeping the singer's lip movements natural. In that respect, tools like Runway handled it much better. My workaround was to apply an animated mask and preserve the original lips of the performer, so the expressions and mouth movements stayed convincing. It feels a bit like a trick, but at the end of the day, filmmaking, video editing, and even faceswapping are all about crafting believable illusions.
Processing, Processing and more Processing
While faceswapping a single image is quick, video footage is much more complex due to continuous pose and expression changes. Assessing results required full video processing, which was time-intensive. Effective time management was crucial for iteration. I had to deal with 60k+ frames in total, each frame taking around 15 seconds...doing some quick math that means around 250 hours, meaning more than 10 days of no stop processing.
And here I'm not even taking into account the endless tests and iterations I did, I'm just talking about the processing time of footage that needed to be delivered.
And it's important to mention also the VRAM issue I encountered: processing too many frames in one go was not possible even for my powerful machine with a RTX A6000 and 256 RAM. This required me to split the single files in different chunks, process them one to one and re-merge everything later on in Adobe Premiere.
And we are assuming that everything is going...to work!
Best Practices for Faceswap Recording (ComfyUI ReActor)
Before the actual recording of our actors, I recorded test footage internally and performed extensive rehearsals and experiments with it. This allowed me to fine-tune lighting, framing, camera angles, and actor positioning, so we were as prepared as possible for the shoot.
I shoot with the BlackMagic URSA 12k and DZOFilm 35mm Prime Lenses. My constraint was that I had to take a a full shot of the subject but at the same time get as many pixels as possible of the face, that's why I experimented with 12k. However the filesize of the braw file was excessive and opted to go down to 8k with a 5:1 compression ratio. Still very big and difficult to manage with my machines, so I opted to shoot in 8k to always have the chance to go back to that resolution, but I actually worked with a .mov 1080p in ComfyUI. All considered this was a good trade-off since the final output on the Hologauze would've been 1080.
We shot at 60fps since the playback on the Hologauze would've been very smooth and contributed in giving that sense of realism, of real performance in front of you that we were looking for.
In terms of faceswap results, what I learned in this phase was that the closer the actor's facial geometry is to the original performer, the more realistic the faceswap or deepfake. Subtle differences in jawline, eye spacing, or head shape can drastically affect results.
When capturing footage for faceswap:
- Lighting: Even, diffuse lighting avoids harsh shadows
- Contrast: Ensure the actor's face stands out from the background
- Camera angles: Mainly front facing, slight headturn allowed.
- Expression variety: Smile, neutral, frown, talking, helps ReActor handle real performance
- Obstruction management: Avoid unnecessary objects in front of the face, but small items like instruments are fine if planned for. Clean forehead is important, no fringe or hair strand in-between
Beyond Faceswaps: Deepfakes with DeepFaceLab
Once the ComfyUI workflow stabilized and I was getting consistent results, I wanted to create a more advanced deepfake by training a custom model, so I turned to DeepFaceLab, widely regarded as the industry standard outside Hollywood-level VFX pipelines.
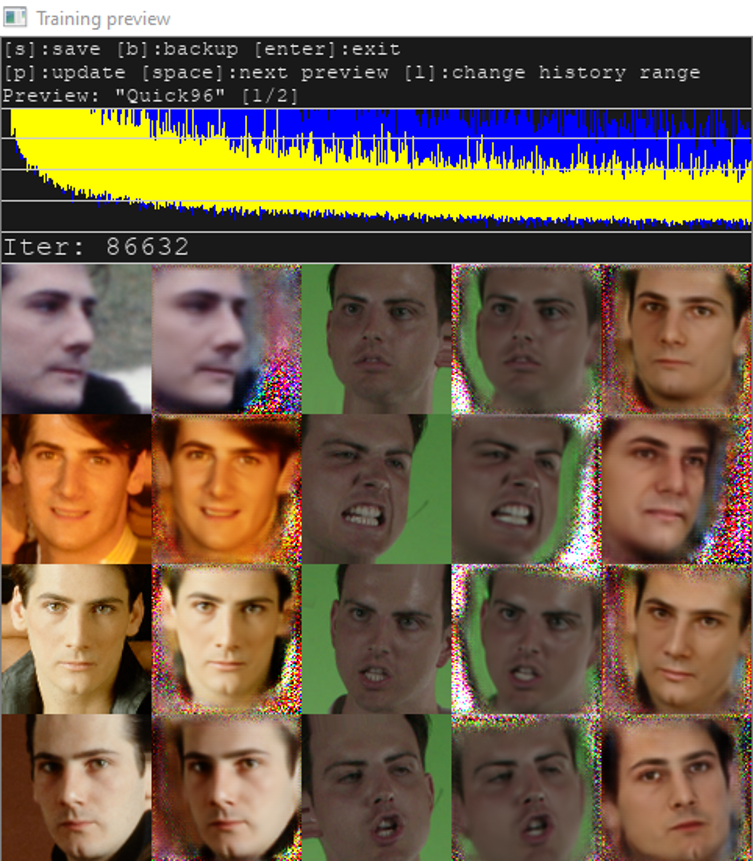
The key difference is that while tools like InSwapper_128 rely on a fixed model trained on millions of generic faces across ages, genders, and traits, DeepFaceLab lets you go further by fine-tuning pre-trained architectures such as SAEHD or Quick96 with your own datasets. By training on images of both the source and the destination person, the model adapts to their unique identities and conditions, producing far more realistic and flexible results than generic swappers.
- Challenge: Limited reference images of the band members.
- For Tony, I collected only a few hundred archive photos, mostly with similar poses and shot in the '80 and digitally scanned, not the highest quality.
- A good dataset requires variety in expressions, camera angles, and lighting
- Dataset augmentation:
- I used Runway to animate still archive photos into short videos with head rotations and expressions
- Extracted frames from these videos and added them to my DeepFaceLab project

Tony Original (200 images) – Limited pose variation, mostly frontal faces. 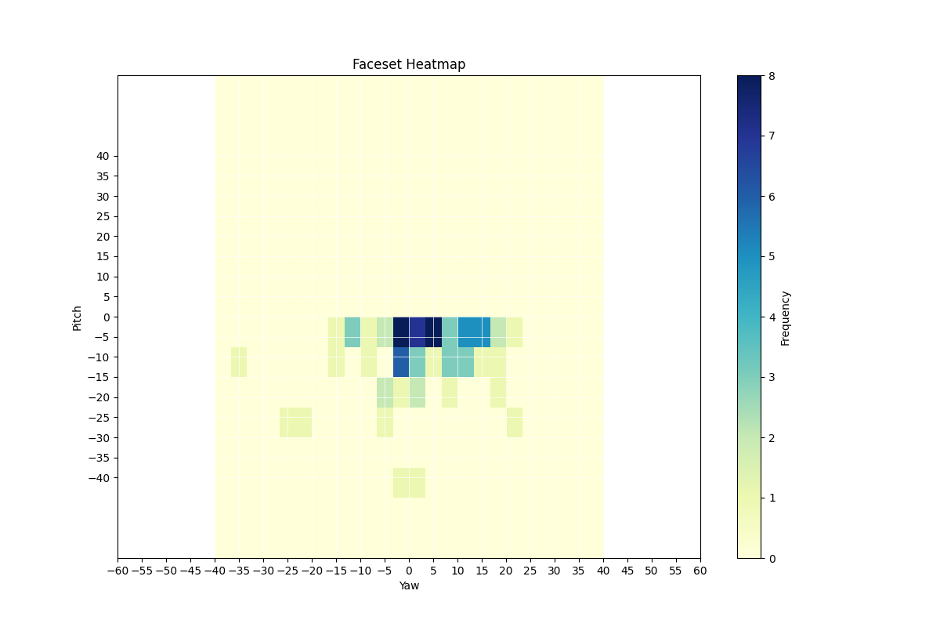
Real Actor (750 images) – Wider distribution of head orientations, more diverse poses. 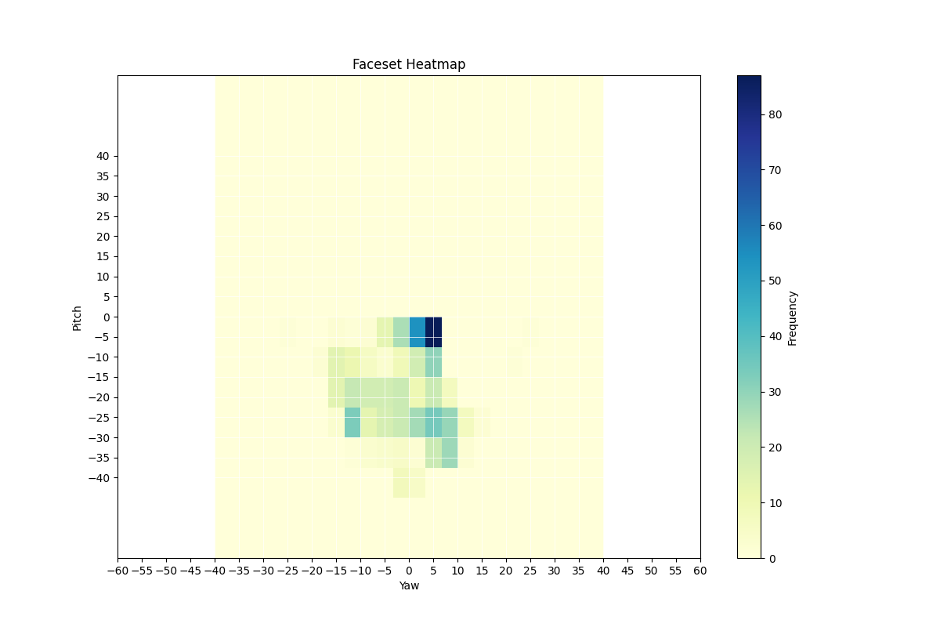
Real Actor Expanded (5,400 images) – Strong coverage across yaw and pitch, more complete dataset. 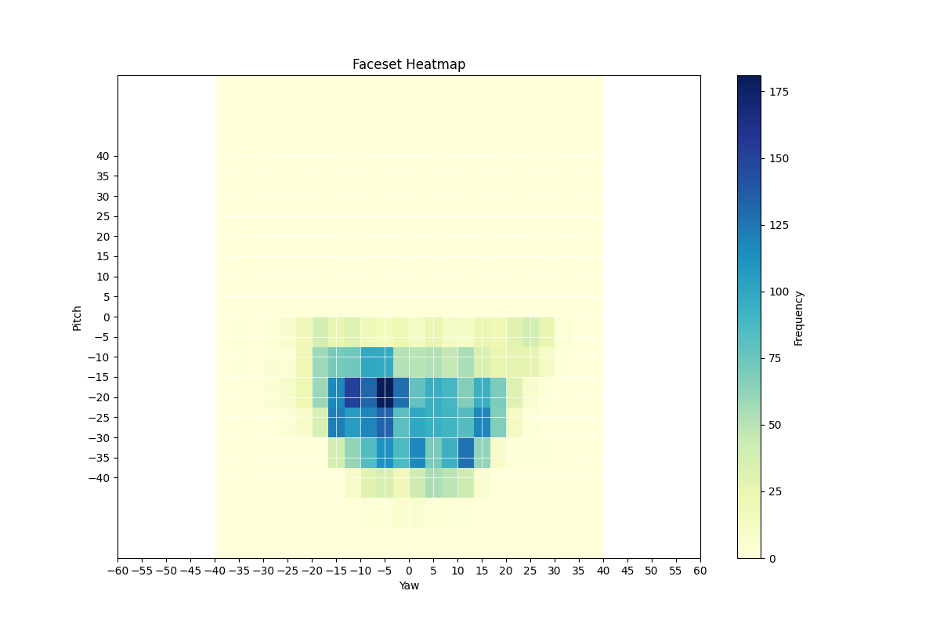
Tony Augmented (1,300 images, Runway) – Expanded dataset with more varied angles, improving coverage. 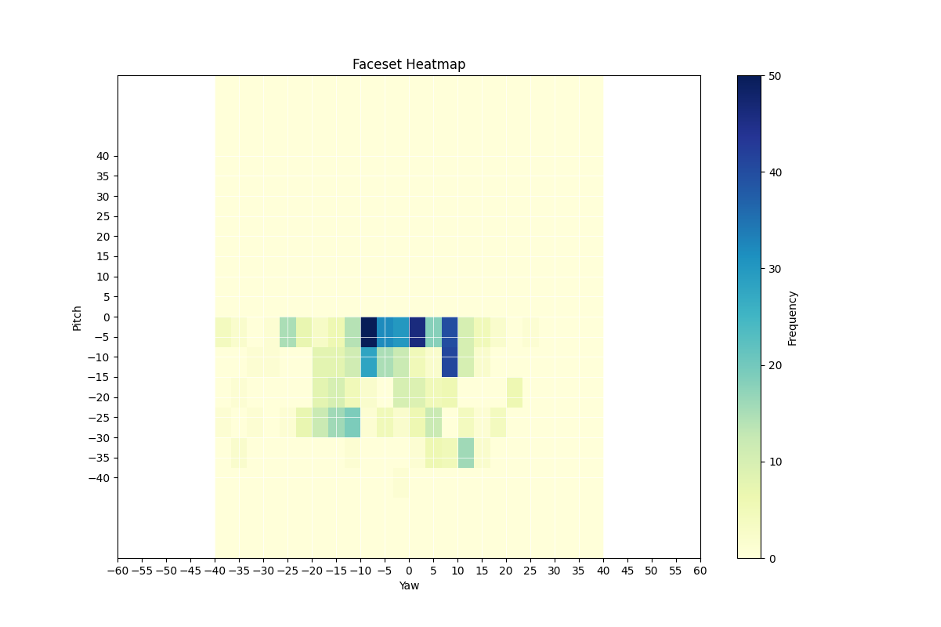
Elon Musk Reference (8,500 images, web) – Extensive dataset (downloaded from here) with very broad pose distribution across yaw and pitch. 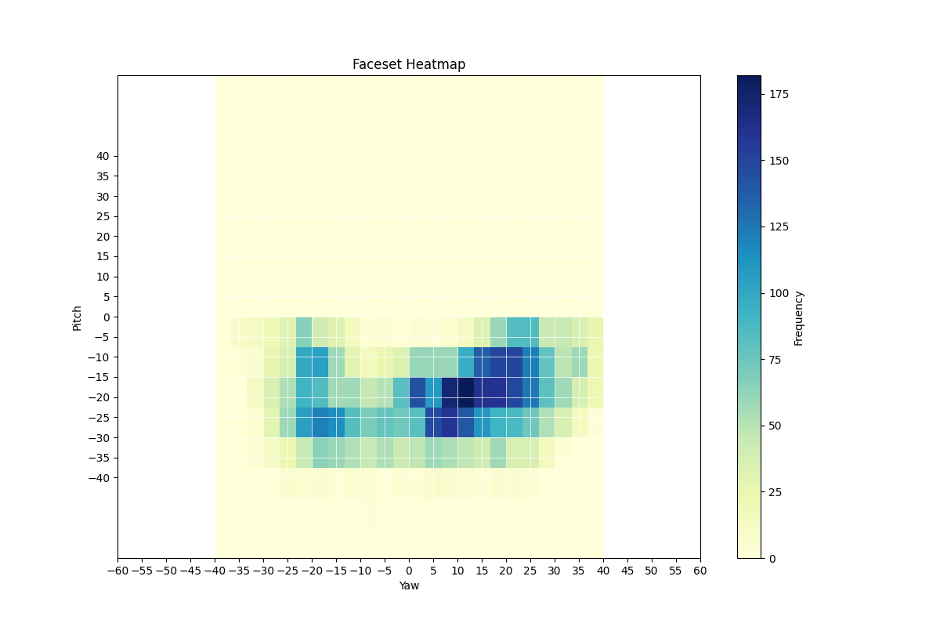
While experimenting, I also looked for tools to score the "deepfake compliancy/appeal" of my source images, trying to identify images that were detrimental to training versus those highly usable. I explored several GitHub repositories with promising approaches, but quickly realized that testing them would be too time-consuming to fit within the project deadlines. Another rabbit hole I couldn't afford to enter in order to deliver on time.
- Training considerations:
- Variety in dataset is critical; otherwise, a model fails on uncommon expressions
- High-resolution images improve fidelity
- Iteration is slow: even small tweaks require retraining for hours or days
- Key takeaway: Dataset quality is often more important than model choice, a larger, more diverse set of images and frames can make a modest model outperform a technically superior one trained on insufficient data.
The following heatmaps visualize the distribution of head orientations (yaw and pitch) across different face datasets. Pose estimation was performed using dlib's 68-point facial landmarks, and the heatmaps were generated with NumPy and Matplotlib, highlighting differences in pose coverage and dataset diversity.
Lessons Learned
- Al faceswapping and deepfake creation exist on a spectrum; not all face alterations are "deepfakes" (Deepfake Spectrum)
- Four main variables affected the output quality of the faceswap: i) The performance, avoiding too quick movements that would introduce blur or occlusion or extreme poses (not front facing) ii) Face geometry and likeness of the actor iii) Reference image (target image) used for the faceswap iv) Faceswap model used (ReActor/inswapper_128)
- Pre-shoot experimentation and rehearsal footage are critical to optimize the final recording
- Actor face geometry heavily influences success; closer resemblance to the original improves realism
- Working directly with terminal and system integration can be challenging but ultimately rewarding
- Open-source tools allow rapid iteration and experimentation, crucial in early-stage R&D
- Using open-source Al tools in commercial projects is a grey area: Each node, model, and dataset comes with different licenses and restrictions. It's easy to overlook these dependencies, which can lead to legal complications if not carefully vetted
This project was a deep dive into Al filmmaking and and opportunity to experiment hands-on how all these new GenAi tools are shaping how we create images&videos, and the implications deriving from this new making process exploring open-source tools, dataset creation, and technical pipelines for a multimedia exhibit. While the end goal was a 1:1 holographic performance, the real adventure lay in experimenting with new technologies, troubleshooting workflows, and learning how to make Al tools reliable and scalable for real-world creative projects.
At the time of writing, Google announced an update to its Al Studio, introducing Nano Banana. Several creators are now recording their performances and swapping them onto cartoons or other characters. Ironically, this makes the workflow I had explored with so much effort feel already outdated and less performant. Yet, in technology, that is the natural cycle of progress, and precisely the kind of challenge and pursuit one is compelled to keep chasing. To the next one.